Monday, February 7, 2011

Hanging Shells and Oars on the Wall

After I posted about our Master Bedroom Redo
I had several people ask how I hung the oars 


and shells on the wall.


For the oars, we screwed two short screws 
(make sure they are short so they don't poke through the other side of your oar!) 
in each end of the oar and then wrapped some wire around each screw. 

This was our make-shift way of making hooks.


Then we screwed some long screws into the wall and attached our "hooks" to the wall screws.

As for the shells, we used very thin nails and simply nailed through the natural holes in the sand dollars.


Jacob held the shells in place awhile I very carefully nailed my little nails through the holes.


For the starfish, I used the same little nails and nailed two nails under the "arms" of the starfish.


The starfish on a rope were actually purchased at TJMaxx a while back. 
They were sitting on a random shelf in a tangled up mess.
The white finger starfish immediately caught my eye, 
so I de-tangled it and snatched it up.


I think it would be pretty easy to replicate though...


Get 5 white finger starfish in varying sizes. 
Drill a tiny hold in the top of each one. 
Attach string through the hole and tie to a long piece of rope.
And there you go!

~ ~ ~ ~ ~ ~ ~ ~ ~ ~ ~ ~

Hopefully that answers some questions!
If not, shoot me an email at jezacharda@yahoo.com and I'd be happy to help :)

Monday, January 31, 2011

Jennifer's Family Room - Virtual Makeover

After I posted about the virtual living room makeover I did for my friend, Christina, a reader by the name of Jennifer left me a sweet comment complimenting my work and challenging me to makeover her "designer's nightmare" family room. 


Since I can't resist a good challenge and I was curious to see this "designer's nightmare",
I decided to take on her challenge.

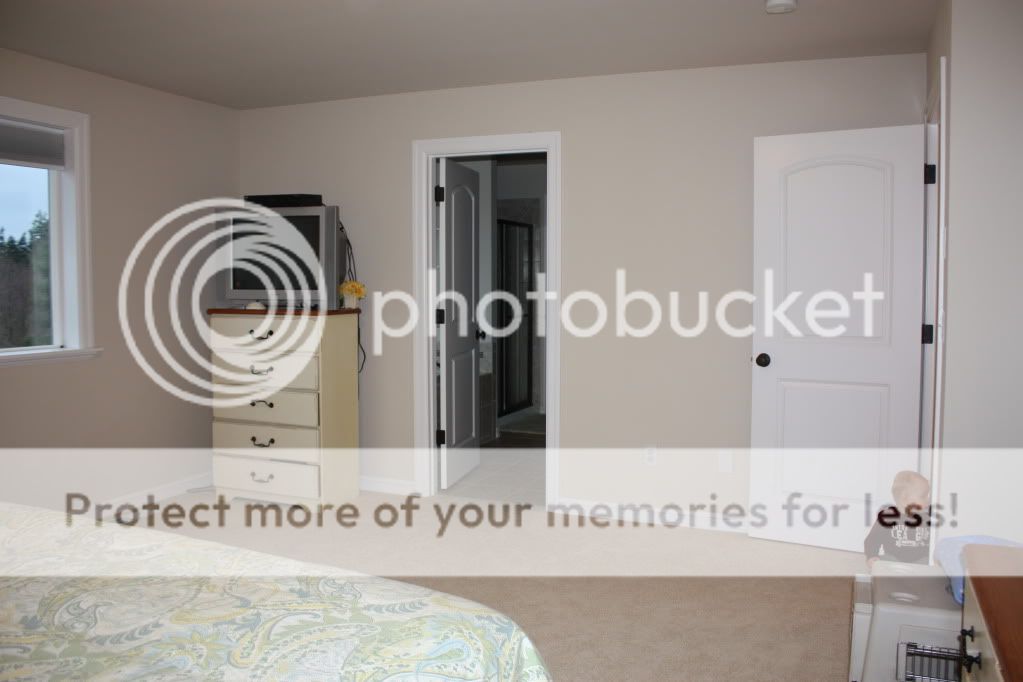
After Jennifer sent me some pictures of her family room
and explained to me that her stairway is a mere 3 feet wide,
I realized this really would be a challenge for me! 

With this being a rental house, I knew I had to come up with something that Jennifer and her fiance would be able to eventually take with them when they decided to purchase their first home.
Another challenge.

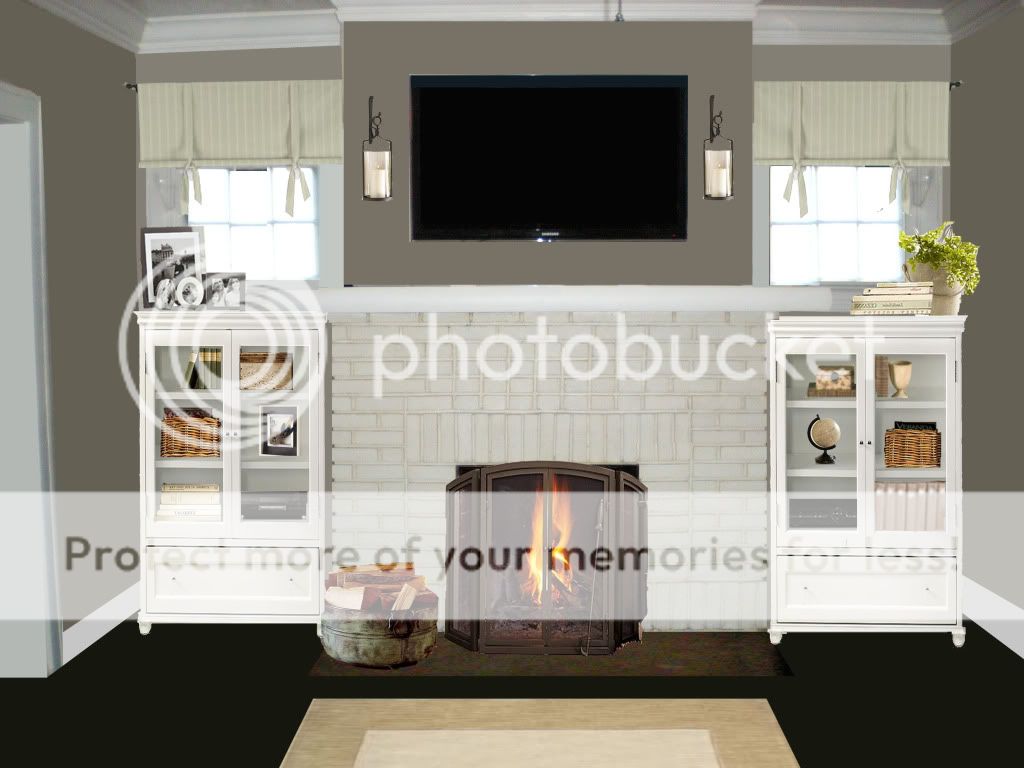
So anyways, after a lot of playing around, here is what I finally came up with...

(hover your mouse back and forth over the images to see the before and after)


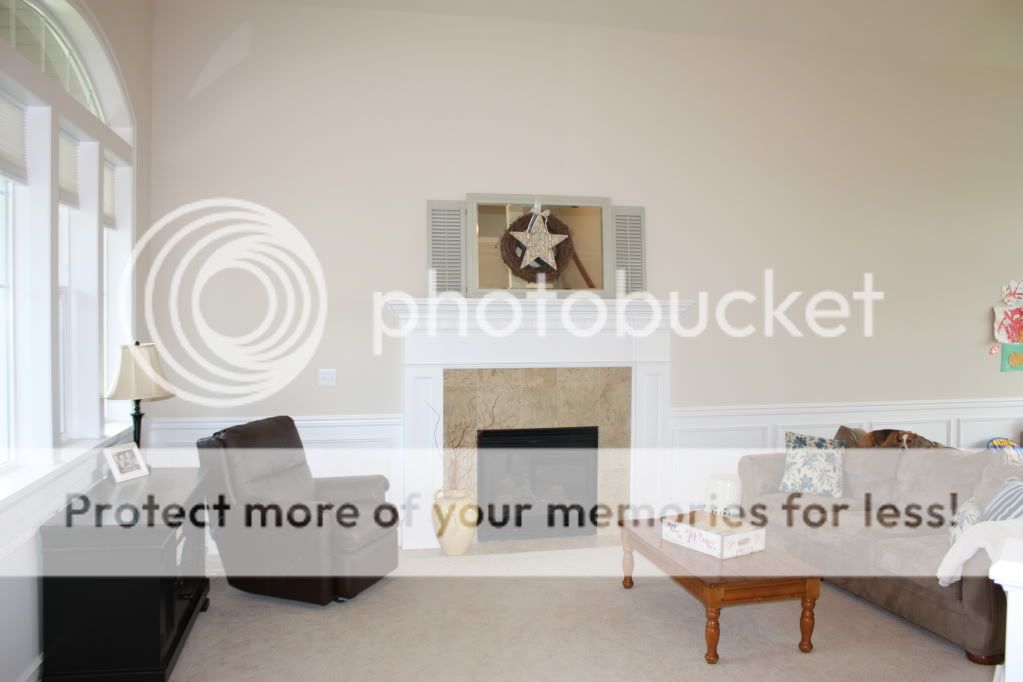
The paint color on the walls, the white mantle and cream brick of the fireplace already looked great. 

I thought Jennifer and her husband could use some storage though to display some of their favorite things. 

My original thought was to have them build some built-in bookcases on either side of the fireplace, 
but I really hated to have them spend their money on something they would have to leave behind when they move out.

So I found these Hampton Bay bookcases from Home Decorators 
at a pretty reasonable price.


I think the glass door are super cute and are a great way to show off collectibles 
and house some of the TV equipment (like the DVD player).
Each bookcase also has a drawer to hide things not pretty enough to display.


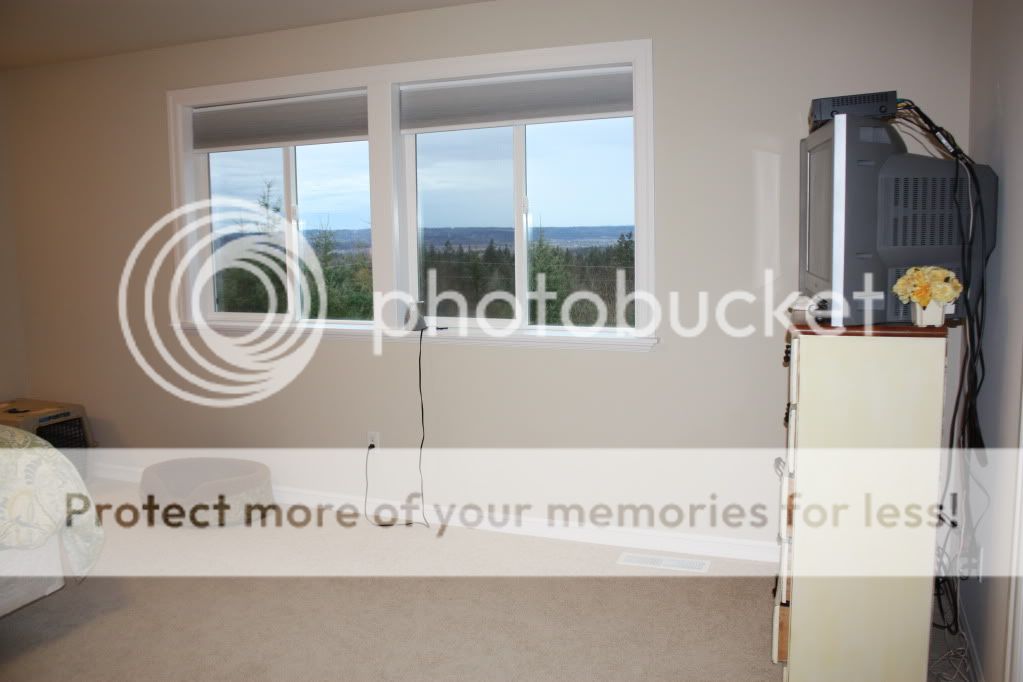
I know Jennifer told me that her current futon had to stay because it was the only thing that would fit up her 3 foot wide staircase, but I did a lot of searching and I found a cute comfy looking couch that is only 33 inches tall. 
So I think that if you turn the sofa on its back, it would fit up the stairs with 3 inches to spare.

Positioning the sofa in the alcove of the bay windows would also help open up the room so that it does not feel so crowded. If the sofa won't fit up the stairs, moving the futon into this spot would work too :)


The couch is called the Horizon Sleeper Sofa in Natural Twill and is from Home Decorators.

 The Melrose Area Rug in Beige is also from Home Decorators.

 A dark wood colored coffee table, like this Cheswick Coffee Table from Pottery Barn, 
would be a nice contrast against the beige rug.

To bring some color into the room, 
I added two Jute Braid Pillows from Pottery Barn (in Mineral Green) to the couch.


Since I put bookcases next to the fireplace where Jennifer and her fiance housed their computer, 
I knew I needed to give them a new place for work. 
I wanted to find a solution though that looked pretty and would hide all of 
their computer and desk "stuff". 
After doing a lot of searching for the right piece of furniture, 
I eventually came across  
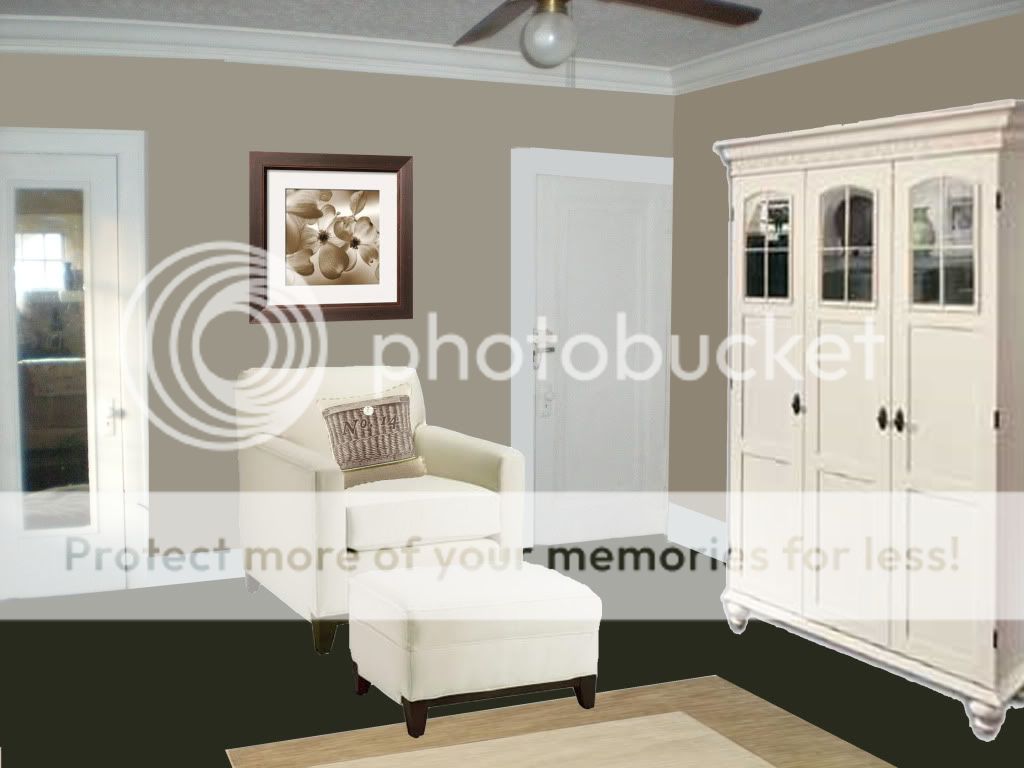
this beauty that not only looks great, it has a ton of storage that can all be concealed behind closed doors.

And to make it even better, it's only $599 at Office Depot!! 
A pretty good price for such a large, good-looking computer armoire!

And last, but not least, I found a narrow chair and ottoman that can hopefully fit up the narrow stairwell.

It's the Martin Arm Chair in Beige Basket Weave from Home Decorators 
and is only 35" H x 32" W.

~ ~ ~ ~ ~ ~ ~ ~ ~ ~ ~ ~

I kept everything in the room pretty neutral so that it didn't clash with the green carpet 
and also to lighten up the room a bit.

I wanted  Jennifer and her fiance to have some classic, neutral pieces that will last them for years. 
As their styles and personalities change over the years, the basic pieces of furniture can be accessorized with colorful accents and changed without breaking the bank.

I hope this gives you some ideas, Jennifer, 
and helps you make your "designer's nightmare" a little more homey.

Wednesday, January 26, 2011

Master Bedroom Project Completed!

One year later,
our Master Bedroom project is 
F-I-N-A-L-L-Y complete.
Sort of.
For now anyways.

Here's a reminder of our blank, bare, non-decorated room just after we moved in...


And here she is now...


Why did it take us so long to complete, you ask??

Well, we had a tiny budget to work with 
and so we scrimped and saved and bought a few things each month.
We also built the bed and the nightstands ourselves 
and I refinished the dresser, which took forever.


 You can read about our farmhouse bed HERE
our nightstands HERE
and the dresser HERE and HERE.


I absolutely love the oars hanging above our bed, 
especially since they are personalized with our wedding date 7/19. 
You can read about that project HERE.


I had a hard time finding just the right accessories for the dresser. 
I played around with a lot of different stuff that I had around the house.
When I stumbled upon the old window in an antique store, I knew it would be a perfect fit. 
It just needed a little cleaning and some touch-up paint.
Of course, my dear husband thinks it's weird. 
"What IS that?" 
"Why would you want an old window?"
He just doesn't get it.
But that's okay.  
I like it and it's sitting on my dresser.

After I found the window, all I needed was a few simple accessories to complete the look...
our wedding picture, a picture of my mom and me sitting on a dock, and some seashells.


 The bedding is all from Pottery Barn (except the white sheets), 
which we bought in pieces over the months.
The duvet cover is called Painterly Paisley
the striped pillow cases are Classic Stripe in Porcelain Blue,
the white quilted king-sized shams are Pick Stitch,
and the small pillow is the Grand Embroidered Boudoir Pillow cover, personalized with our initials.


In order to save money, we saved the tall white dresser in the corner holding the TV. 
I just repainted it white and angled it into the corner so the TV cords are all hidden now.

Someday I'd like a flat screen TV and a different piece of furniture there, 
but for now it will do.

My mom found me the antique blue water jug at an antique store. 
When I was a kid, my parents had one in their room that held spare change.
The entire family put their coins into the jug to save up for a family trip to Disneyland.
We are now doing the same in our house with our jug.
My kids LOVE putting money (and anything else that will fit) into it.

Looks like some sneaky little child put some of my shells in the jug recently...


The two sea shell prints hanging on the wall next to the door are from art.com by Denis Diderot. The weathered-looking frames and mats are from Aaron Brothers.


And these prints on the other side of the room are from Ikea from a long time ago - 
I think I bought them when I was in college, like 10 years ago.
I just repainted their frames and bought a new mat for the larger picture.

The only thing that I'm really not happy with is this corner...


The wicker chair belonged to my Grandma. 
It used to be white and I didn't like it, so I spray painted it brown. 
Now I think it's too dark for the room.
It would look better on our front porch.

So I am on a Craigslist hunt for the perfect chair to put in that corner...someday.
I also just ordered three individual pictures of my kids at the lake
that I plan to hang in frames above the chair. 
I already have the frames...
if you look close you can even see them sitting on the floor behind the wicker chair :)

And for those of you that enjoy a good before and after visual,
hover your mouse back and forth over the pictures below to see our transformation...


Just a few minor tweaks and it's officially done. 
I'm finally ready to move on and start a new room.
Let's just hope the next project doesn't take a whole year :)

Visit thecsiproject.com

Friday, January 7, 2011

Before and After Virtual Makeovers via Rollovers

I am in love with redesigning rooms - virtual style. I have so much fun doing it!
If I didn't have kids, I think I could sit at my computer all day playing around.
Someday, I'm hoping to turn my passion into a business to bring in some (much needed) cash.
But for now, I'm just having fun and building up a portfolio of my work (see below).

Anyways, I've been messing around and trying to figure out how to show my virtual transformations with rollovers and I finally got it to work. 

To see what I mean, hover your mouse back and forth over the pictures below to see the transformations.


I don't know why this was so hard for me to figure out...
Really it's just three easy steps.
I'm no HTML expert, in fact I'm quite the novice. But I am good at googling how to do things and playing around on my own blog until I can figure it out. 
You can't learn anything if you don't give it a try!

I figured out how to do the above rollover images by using the tutorial found HERE.

Monday, January 3, 2011

Living Room Chairs

 I mentioned in a previous post (our virtual living room makeover) that Jacob and I bought chairs for our living room this year instead of Christmas presents for each other.

When we first started shopping for chairs, I was looking for something light colored and upholstered.
Something that looked soft and comfy.
Jacob was looking for leather.
I did not want leather.
I wanted our living room to have an airy, vintage, beachy feel. 
To me, leather did not fit into that picture.

One of our final stops while out looking for chairs was JCPenney.
We quickly cruised through their furniture department 
{with our kids running rampant and causing a ruckus}. 
I didn't see anything I liked and I was ready to get our kids, who were melting down, back to the car.

While I was chasing down the kids, Jacob parked himself in the leather chair section. 
I didn't bother to join him because like I said, I didn't want leather.
A few minutes later, I heard him calling me over....
"Erin! Come check this one out!"
So, with the kids in tow, I walked over and saw him lounging in this chair...

"It's okay," I said while turning up my nose.
"But it reclines!" he replied.
I could tell he was in love...with the chair.
So I said, "I'll think about it." to appease him.

When we got home, I found the chair online and stuck it into a picture of our living room.


After adding in some accessories to give the room that airy, vintage, beachy feel I was after, 
I decided that I actually liked the leather chairs.
And marriage is all about compromise, right??

So even though I didn't think leather fit into my picture...
I think they are going to work out just fine...
AND I have a happy husband {he mostly loves the fact that he won}.


I think they look strikingly similar to these ones from Pottery Barn...

except theirs is priced at a hefty $1,199 EACH {plus shipping}
and we only paid $888 for TWO!
{we waited until they were on sale plus we found an online coupon}
To avoid paying $250 for delivery, we also opted to have them delivered to our local JCPenney for FREE!
And yes, they are real leather,
not that plastic-y stuff that's supposed to look like leather.

I love getting a good deal...
but who doesn't!?