When Maggie wrote to me asking me for some guidance on what to do with her family room, I was delighted to help her out. She had me at "I'm a first grade teacher from Washington..." and "I just love the beachy, Pottery Barn look..."
Ahhh, a girl after my own heart :)
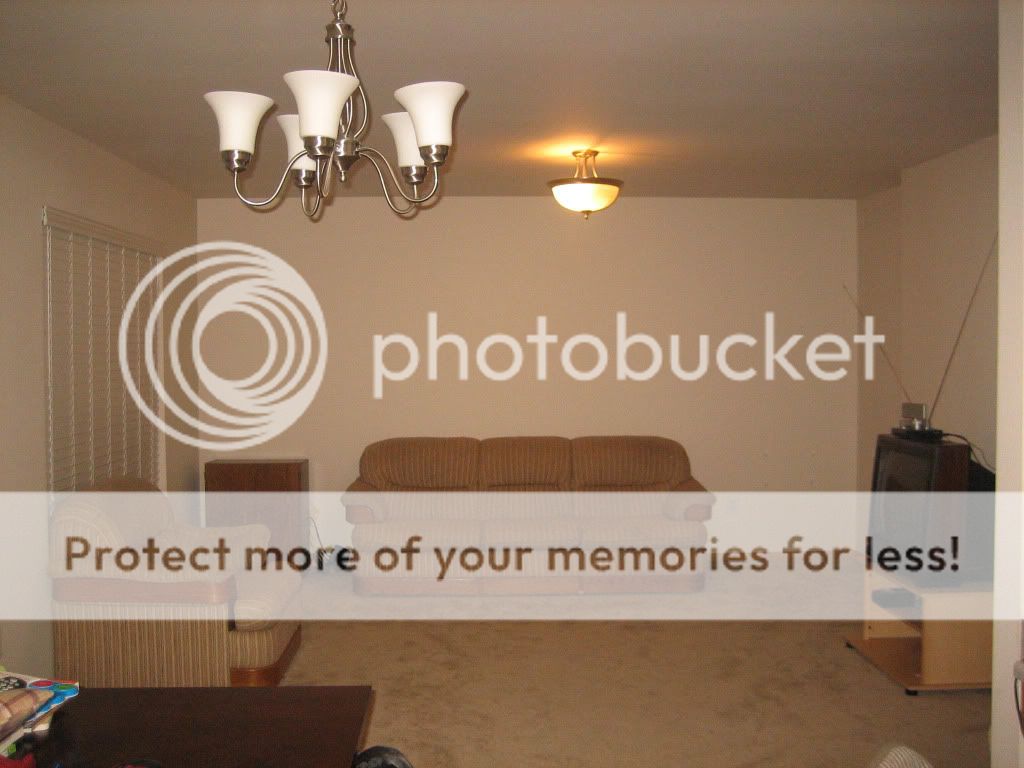
She described her room by saying "...it is red, black, yellow, and way too manly." She was also having a hard time figuring out what to do with the fireplace, the main focal point of the room. Maggie was looking to take the room from its current state to something warm and inviting with a cottage feel.
Ahhh, a girl after my own heart :)
She described her room by saying "...it is red, black, yellow, and way too manly." She was also having a hard time figuring out what to do with the fireplace, the main focal point of the room. Maggie was looking to take the room from its current state to something warm and inviting with a cottage feel.
So here ya go, Maggie...
{hover your mouse on and off the image below to see the instant transformation}

Here is the AFTER still images for those of you who couldn't view it above.

Please keep in mind that this Redesign in for inspiration purposes only...
I don't know if this is even possible without seeing the fireplace in person and tackling the fireplace project myself,
but my idea was to cover up the exposed chimney with beadboard, making the area above the mantle an even surface. Since the TV will be hanging from it, it would have to be pretty solid with a frame built behind it to support it all.
The current gray tiles could be covered up (or ripped down) and replaced with smooth, river rocks to add some texture to the room.
 You can buy river rock mosaic "tiles" to attach to the facade of the fireplace at home improvement, like the ones shown above from Home Depot. They are installed much like tile with thinset and grout.
The current gray tiles could be covered up (or ripped down) and replaced with smooth, river rocks to add some texture to the room.

Then after a little demo work, some white built-in bookcases could flank either side of the fireplace. After adding some white crown molding to the top of the room to tie it all together, I think the fireplace would definitely go from "manly" to "cottage-y".
In addition to the fireplace transformation, I also stuck in some new furniture pieces, window treatments, accessories, and a new paint color to give the whole room that laid-back cottage feel.
In addition to the fireplace transformation, I also stuck in some new furniture pieces, window treatments, accessories, and a new paint color to give the whole room that laid-back cottage feel.

I chose Sherwin Willaims' Rice Grain for the walls to cover up the yellow and make the walls a little more neutral. This is an excellent light colored paint that adds warmth and lends itself to a beachy vibe {since it mimics the color of sand}.
To dress up the windows I layered some white Ikea Drape Panels over bamboo roman shades {these can be found at Lowe's, Home Depot, Bed, Bath & Beyond, etc}.
Maggie said that she had been drooling over the Dhurrie Diamond Soho Trellis Rug in Taupe from Shades of Light for ages, so that one was a no-brainer! Isn't it a gorgeous rug!?


As for the new chairs, I thought is would be fun to mix the Woven Banana Leaf Armchair from Pier One along with an upholstered chair {Buchanan Swivel Armchair in Camel from Pottery Barn}. Purchasing an upholstered chair that swivels would allow people sitting in it to relax in the family room while still being able to turn and maintain conversation with those in the kitchen area.
If Maggie chooses to replace her sofa, I though the Buchanan Curved 3-Piece L-Shaped Sectional in Camel from Pottery Barn would be a good fit with its warm color and over-stuffed comfy cushions.
The light blue pillows and plain white pillow are from Pottery Barn while the Starfish and Beach pillows are from Etsy.com.
The rustic pine stain on the coffee table, console table, and round side table {all from Pottery Barn} help give the room that laid-back, casual feel.
{P.S. there is no set rule that you have to match your wood furniture to your wood floors!}
I know Maggie likes vintage finds, so any of these wood pieces of furniture could easily be swapped out with something a little more "chippy" and still flow well with the overall look of the room.
If you look at the design inspiration board above, you will see a white chippy trunk placed under the console table...
I thought this would look so great in Maggie's room,
however,
it was a random piece found in a Pottery Barn picture, so I don't know where you can score an exact copy, but some vintage treasure hunting should lead to something equally cool :)
The large trunk-style basket {Large Colton Woven Trunk from Pottery Barn} placed next to the couch makes a great little side table while also serving as storage for blankets and other goodies.
The lamps in the design board are the Bottle-style Bacchus Glass Table Lamp with Burlap Tapered Drum Shade from Pottery Barn, but similar glass base lamps can be found elsewhere {like Ikea and Target} for much cheaper...


I thought this style of lamp would work well for Maggie, who loves to beach comb, so that she could have a place to showcase her beachy treasures.
Lastly, I hung this sweet sign over the doorway...
 It can be purchased from Susie Harris' shop.


I thought this style of lamp would work well for Maggie, who loves to beach comb, so that she could have a place to showcase her beachy treasures.
Lastly, I hung this sweet sign over the doorway...

Below are some great images I found online while searching for inspiration for this Redesign...


Maggie also wanted help with the layout of their furniture. She wanted the room to be a place for relaxing, but also a place where everyone wants to hang out. She wanted to keep her current couch, but was concerned that its placement wasn't working well for the flow of the room.
So I sketched out a rough drawing of Maggie's floor plan and played around with the placement of furniture and in doing so, I figured out that the current location of the couch really is the best spot for it (sorry, Maggie!)
When you have an odd-angled room, like Maggie's, the key to furniture placement is to work with the angle of the room, mimicking the angle of the room with the layout of the furniture. This usually means placing the largest seating piece (usually the couch) across from the room’s architectural focal point, so it looks into it.
{to read more about furniture placement in odd-angled room, there's a great post HERE by Your Decorating Hotline}
Here are two options for furniture placement that I came up with for Maggie's space...
OPTION #1

Option #1 shows how Maggie could keep her current couch, leaving it in it's same location while adding in some new pieces of furniture.
OPTION #2

While I know Maggie wanted to keep her current couch, I thought I'd show her what the floor plan could look like if she replaced the couch with a large, comfy sectional to give her ample seating and make the room that space "where everyone wants to hang out".
Hopefully this gives you some direction, Maggie, in your quest to makeover your Family Room! Happy Decorating!

I LOVE doing Redesigns for people, however, they are very time consuming!
While I have been providing these services free of charge, I feel that the time has come for me to start earning payment for my work.
So if you are interested in having a Redesign for one of your spaces, please stay tuned for more information and pricing! When I am ready to start accepting clients, you will see a new tab at the top of the page titled "Redesign Services".
Hopefully this gives you some direction, Maggie, in your quest to makeover your Family Room! Happy Decorating!
I LOVE doing Redesigns for people, however, they are very time consuming!
While I have been providing these services free of charge, I feel that the time has come for me to start earning payment for my work.
So if you are interested in having a Redesign for one of your spaces, please stay tuned for more information and pricing! When I am ready to start accepting clients, you will see a new tab at the top of the page titled "Redesign Services".